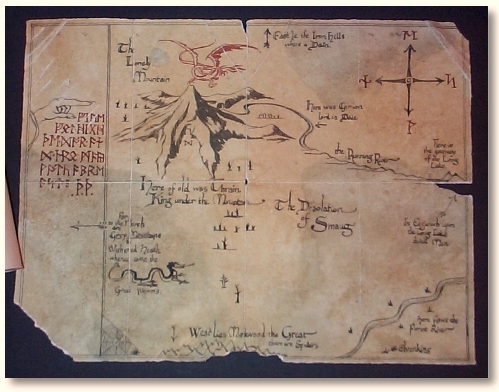
This classic Tolkien map is shown in The Fellowship of the Rings for a few moments as Gandalf is going through some of Bilbo's things in Bag End. This map is one of Bilbo's mementos of his journey with the Dwarves in "The Hobbit".
This map is printed on aged parchment, drawn to match the prop seen in film. The lettering and artwork was done with an old fashioned dip pen, just like the original prop. It is aged using a three-step method to give it the worn look of a old world treasure map. Every fold, wrinkle, scratch and tear that is on the original prop is replicated here precisely.
Every detail is captured in the beautiful reproduction. Smaug, the dragon flying above the Lonely Mountain, the Runes on the left of the map and the directions on the compass are all printed in red ink, recalling the maps included in older editions of Tolkien's classic novel.
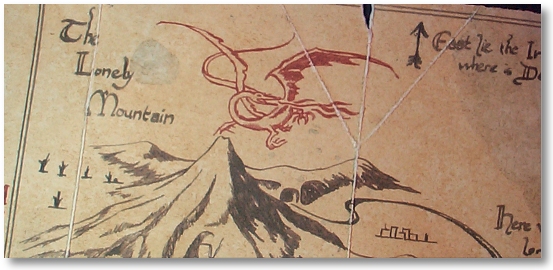
Smaug and the Lonely Mountain have changed dramatically from the stylistic art found on the original Tolkien version but still maintain the style of Thror's Map.
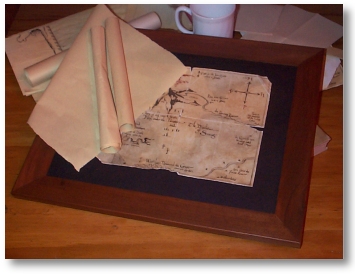
This hobbit-sized map (measures about 8 1/2" x 11" identical to the original prop) looks great mounted on an old frame (here shown mounted on an aged New Zealand Rimu frame in the same style as shown in the film). Looks great displayed hung on the wall, or laying about other maps, papers and scrolls as Bilbo always had.
As an added bonus, I wrote Thror's Moon-Rune inscription in a special invisible ink, which glows bright white when shone with an ultraviolet light.

|